One of the most helpful things you can do when planning wall art is send a quick photo of the wall where you might want to display your portraits.
With a simple phone photo, I can create a digital preview that shows exactly how your images could look on your wall. This helps you see the right size and layout before ordering anything.
Follow the steps below so the preview is as accurate as possible.
Step 1: Choose The Wall
Start by choosing the wall you are considering for your portraits.
Common spots include:
- Above a couch
- Over a bed
- A hallway
- A staircase wall
- An entryway
You do not need to be certain yet. Even a rough idea is helpful.
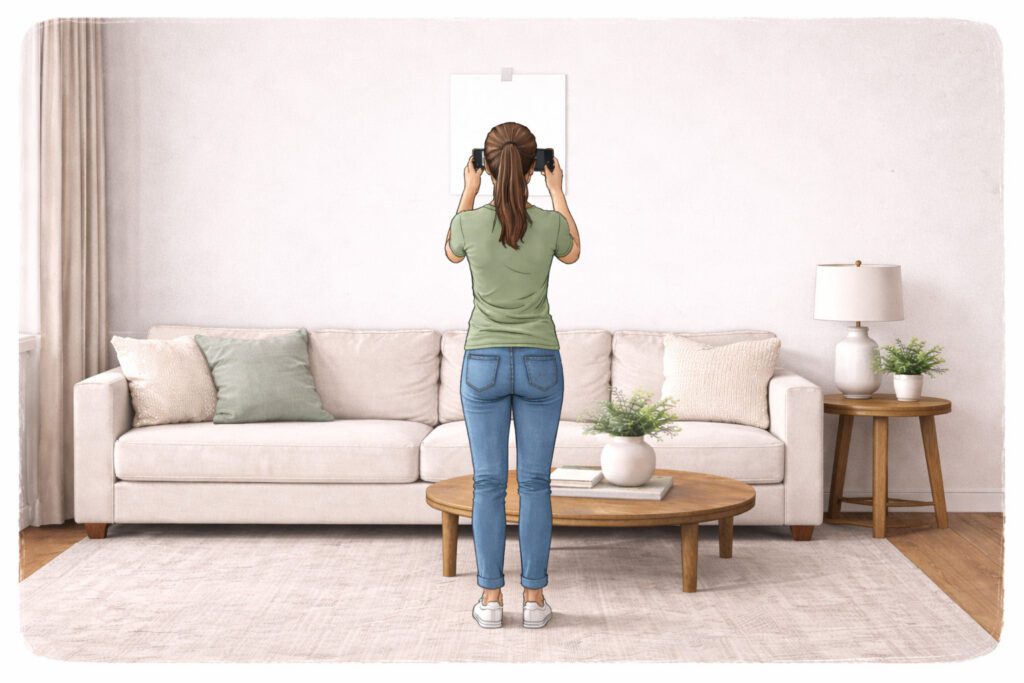
Step 2: Tape A Piece Of Paper To The Wall

Tape a standard sheet of printer paper (8.5 × 11 inches) to the wall.
This gives me a known size reference so I can scale the artwork accurately in the mock-up.
Place the paper roughly where the center of the artwork might go.
Step 3: Stand Back And Photograph The Wall
Using your phone:
- Stand several feet back
- Make sure the entire wall is visible
- Try to hold the phone straight and level
Avoid taking the photo from an angle if possible. The straighter the photo, the more accurate the preview will be.
Step 4: Include The Surroundings
It helps to include nearby furniture and architectural details such as:
- couches
- beds
- stair railings
- windows
- mantels
This allows the artwork to be scaled correctly for the room.
Step 5: Send The Photo
Once you have the photo, simply send it to me:
From there, I can create a preview showing how different artwork sizes or groupings might look on your wall. Seeing the images in your actual space often makes the decision much easier.
Many families are surprised by how different sizes feel once they see them on their wall. What seems large on paper often ends up being the perfect size in the room.
If you’d like, you can send photos of multiple walls. We can explore different possibilities together and see what feels best in your home.